Thursday, April 30, 2009
We're Back!
Ok, two things to note here....
1. Check out Ashley's blog, she made some super cute Chrry Coke Float Cupcakes also!
2. Voting is open at Iron Cupcake, please click on the badge in the right hand corner (thankie to you all!)
3. Ian and I are BACK! Exam's are over and summer is here, we are very excited.
Monday, April 27, 2009
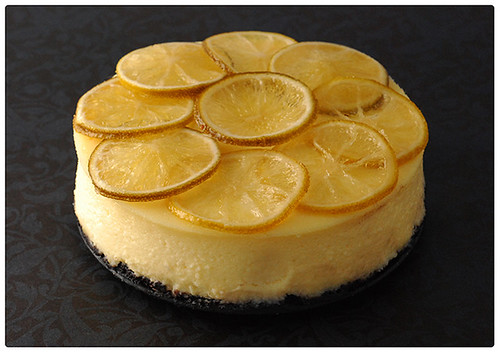
Key Lime Cheesecake -- DB's
Ian and I have been waiting to post this for quite a long time now; it's the Birthday Cake that I made for him... which also doubles as the Daring Bakers Challenge this month. As you probably know by now Ian looooves citrus, making this his new favourite dessert.
I once made a key lime pie with an Oreo crust and candied limes on the top so I knew this combination would turn out great. I just switched out the recipe for key lime cheesecake then baked them in my mini springform pans and they tasted so creamy and delicious. And yes, this was the dessert that I was making when the thumb injury occurred. Watch your fingers around a mandolin…
I heard that cheesecake could be made with a few less calories so I used two regular bars of cream cheese and one low fat bar. I also switched the full fat cream for 15% and I don’t think anyone knew. It tasted like it was a heart attack waiting to happen, just as a cheesecake should.
The April 2009 challenge is hosted by Jenny from Jenny Bakes. She has chosen Abbey's Infamous Cheesecake as the challenge.
Abbey's Infamous Cheesecake:
crust:
2 cups / 180 g graham cracker crumbs
1 stick / 4 oz butter, melted
2 tbsp. / 24 g sugar
1 tsp. vanilla extract
** I substituted 2-1/2 cups of Oreo crumbs with 1/2 stick of butter for the crust.
cheesecake:
3 sticks of cream cheese, 8 oz each (total of 24 oz) room temperature
1 cup / 210 g sugar
3 large eggs
1 cup / 8 oz heavy cream
1 tbsp. lemon juice
1 tbsp. vanilla extract (or the innards of a vanilla bean)
1 tbsp liqueur, optional, but choose what will work well with your cheesecake
**Key lime - add zest from one lime to sugar before mixing with cream cheese. Substitute lemon juice, alcohol, and vanilla with key lime juice.
DIRECTIONS:
1. Preheat oven to 350 degrees F (Gas Mark 4 = 180C = Moderate heat). Begin to boil a large pot of water for the water bath.
2. Mix together the crust ingredients and press into your preferred pan. You can press the crust just into the bottom, or up the sides of the pan too - baker's choice. Set crust aside.
3. Combine cream cheese and sugar in the bowl of a stand-mixer (or in a large bowl if using a hand-mixer) and cream together until smooth. Add eggs, one at a time, fully incorporating each before adding the next. Make sure to scrape down the bowl in between each egg. Add heavy cream, vanilla, lemon juice, and alcohol and blend until smooth and creamy.
4. Pour batter into prepared crust and tap the pan on the counter a few times to bring all air bubbles to the surface. Place pan into a larger pan and pour boiling water into the larger pan until halfway up the side of the cheesecake pan. If cheesecake pan is not airtight, cover bottom securely with foil before adding water.
5. Bake 45 to 55 minutes, until it is almost done - this can be hard to judge, but you're looking for the cake to hold together, but still have a lot of jiggle to it in the center. You don't want it to be completely firm at this stage. Close the oven door, turn the heat off, and let rest in the cooling oven for one hour. This lets the cake finish cooking and cool down gently enough so that it won't crack on the top. After one hour, remove cheesecake from oven and lift carefully out of water bath. Let it finish cooling on the counter, and then cover and put in the fridge to chill. Once fully chilled, it is ready to serve.
Pan note: The creator of this recipe used to use a springform pan, but no matter how well she wrapped the thing in tin foil, water would always seep in and make the crust soggy. Now she uses one of those 1-use foil "casserole" shaped pans from the grocery store. They're 8 or 9 inches wide and really deep, and best of all, water-tight. When it comes time to serve, just cut the foil away.
Thursday, April 23, 2009
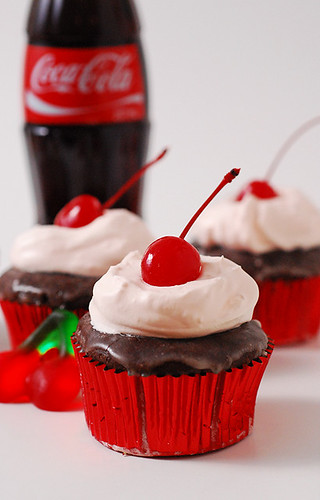
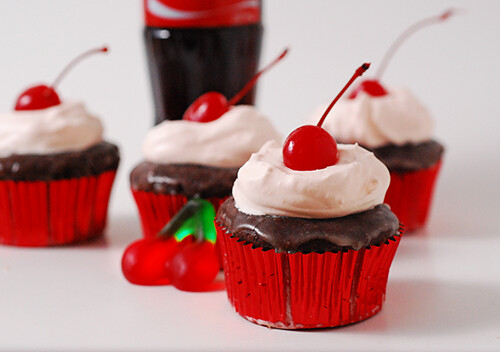
Cherry Coke Float Cupcakes! Iron Cupcake Earth
Hey guys, so Ian and I just joined this challenge called Iron Cupcake Earth and as you can see the theme for this month was SODA, or in Canada... POP!! (Why don't we say soda?)
It turns out that we can win a ton of great stuff (see the super cute aprons, Hello Cupcake book, and other cupcake paraphernalia below)but we need your help... you need to click on the IRON CUPCAKE badge on the top right hand side of the blog and VOTE! The polls open on April 29 at 8 p.m. and will be open through Monday, May 4 at 12 noon. Thanks guys!
I tried to remember my favourite pop growing up and all I could think about was cherry coke floats. We even had an old school fridge in the basement dedicated to holding all things Coca Cola. My dad used to get out the big beer steins and drop a great big scoop of ice-cream into them. My brother and I loved seeing the pop fly everywhere; my mother on the other hand... did not.
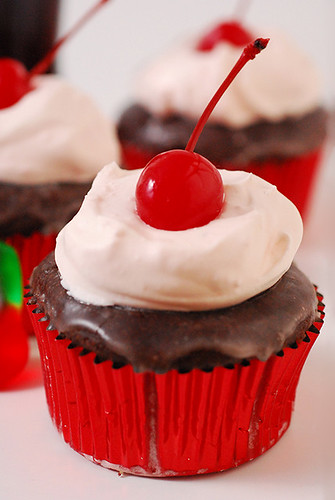
These cutie cupcakes are made with cherry cola, and even have a cherry baked into the center of them! The cupcake was glazed with a cola icing for the “float”, then topped with cherry buttercream, the “ice-cream”…and a cherry of course!
If you want to be one of the cool kids and bake your little heart out with us you can sign up at http://www.ironcupcakeearth.com
The April ETSY PRIZE-PACK is from artists:
A creation by FRUITFLYPIE,
a pair of cupcake earrings from LOTS OF SPRINKLES.
a sweet surprise from Sweet Cuppin' Cakes Cupcakery
PLUS, IronCupcake:Earth can not forget our good friend, CAKESPY, who is now going to be doing a piece for our winner each month until further notice - sweet!
Last and certainly not least, don’t forget our corporate prize providers: HEAD CHEFS by FIESTA PRODUCTS, HELLO CUPCAKE by Karen Tack and Alan Richardson, JESSIE STEELE APRONS ; TASTE OF HOME books, a t-shirt from UPWITHCUPCAKES.COM . Iron Cupcake:Earth is sponsored in part by 1-800-Flowers, .
Cherry Coke Float Cupcakes
adapted from Nigella Lawson's 'How to be a Domestic Goddess'
makes 12 cupcakes
Cupcakes
1 1/2 Cups flour
3/4 Cup sugar
1/2 tsp baking soda
1/4 tsp salt
1 large egg
1/2 Cup buttermilk
2 tsp vanilla
1/2 cup unsalted butter
3 Tbs cocoa powder
3/4 Cup Coca-Cola
1/4 cup marachino cherry syrup
24 marachino cherries
Cola Icing
1 cup Icing sugar
2 tbsp cola
Preheat the oven to 350 F.In a bowl, combine the flour, sugar, baking soda, and salt. Beat the egg, buttermilk, and vanilla in a second bowl. In a saucepan, boil the Coca-Cola, and cherry syrup gently for five minutes. Melt in the butter and cocoa powder. Pour into the dry ingredients, stir well with a wooden spoon, and then add the liquid ingredients, beating until everything is blended.
Pour into the cupcake pans and push a cherry into the center of each cupcake. Bake for 15 minutes or until a cake tester comes out clean.
When cool drizzle over the Cola Icing and let dry. Top with cherry buttercream and a cherry.
Tuesday, April 21, 2009
Lemon Tea Cakes!
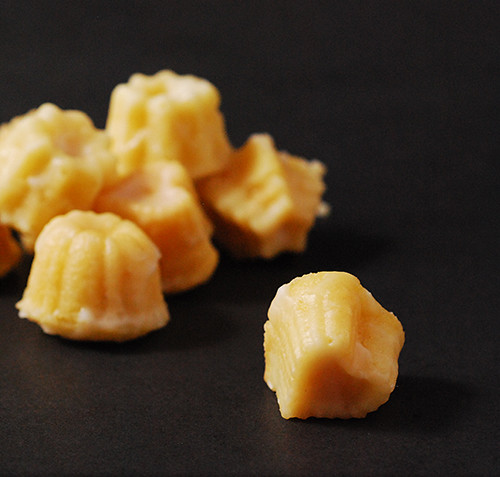
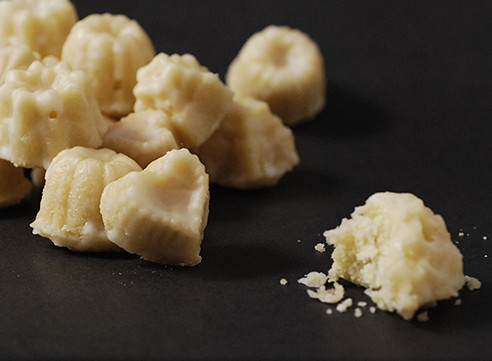
Are these not the cutest things you've ever seen! Last time I was in Toronto I saw this super cute tea cake pan and had to have it. I have been meaning to use it for the past month, but truth be told, I was a little afraid. The man that sold it to me said that if I didn’t oil and flour it just right the little guys would stick and create a crumbly mess. Then I actually saw a sticky catastrophe on someone else’s blog and really got scared.
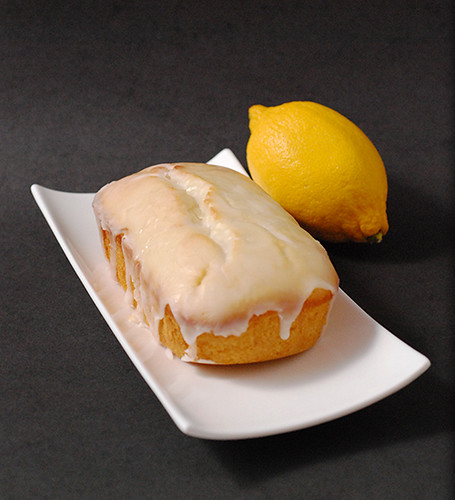
I decided that I needed something dense and that wouldn’t rise very much so that the suckers would just pop right out. Pound cake it was, and Ian is a lemon fanatic making it an easy choice. I looked at Martha Stewart’s recipe, and then heard about the Barefoot Contessa’s. Well it turns out that the two recipes are the same, and Ina actually took Martha’s! Oh the horror! I wouldn’t mess with Martha, she’s got a record.
Anyways, they didn’t stick at all! Oh, and the taste was amazing, I made these for the Supper Club and while everyone was mingling, Ian’s roommate would tiptoe into the kitchen and steal one or two at a time for Ian and himself. Then they would stand in the corner and eat their contraband snacks. Sneaky guys, very sneaky.
If you are interested in the recipe you can find it here.
Monday, April 20, 2009
Mashed Potato Gratin with Carmelized Onions
Last night was the second gathering of our new Supper Club and it was quite a turnout. I don’t know about all of you but I had a blast! Ian and I wanted to pick something simple that everyone would like, so we went with the same menu as his Birthday dinner... RIBS! On Saturday I went to the Maitre Boucher and picked up 10 POUNDS of ribs, then proceeded to cook them all in my tiny oven.
Even though ribs were the star of the show, many people couldn’t get enough of the supporting actor, the mashed potato gratin with caramelized onions. Basically this dish is made from Ian’s delicious mashed potatoes with a generous layer of caramelized onions in the middle and topped with grated 2 year old port soaked cheddar.
This mashed potato recipe has been a winner since the first time I made it, and whenever my mom or I have to bring a side dish to a party, we make this. Plus it is so easy and can be made well in advance. For years people have been asking for the recipe so here it is guys, use it wisely! Usually I make them with grated Asiago on top instead of the cheddar which gives a great punch but some people don’t like strong cheese so old cheddar is a great alternative.
Ian and I just wanted to thank all of you for a great night, and especially Kelly who made a killer beer and caraway seed bread and her little darling two year old Mason, who tuckered himself out making butter from whipping cream for the bread. Also, big thanks to Alex who brought a super decadent flourless chocolate cake and perfect apple pie. We couldn’t have done it without you guys!
Mashed Potato Gratin with Caramelized Onions
adapted from a really old LCBO magazine
this is my half recipe that serves 4-5 people
1 tbsp olive oil
3 cups sliced sweet onions
Salt and pepper
1 tbsp sherry vinegar
2/3 cup chicken or beef stock
Freshly ground pepper
1-1/2 lbs yellow fleshed potatoes, peeled and cut in even-sized chunks
10% cream or a couple spoonfuls of sour cream
2 tbsp butter
Salt and freshly ground pepper
½ cup grated Asiago or 2 year old cheddar cheese
Heat oil in a large pan over medium heat. Add onions and salt and sauté until onions start to soften. Add half a cup of water and continue to cook until the water has evaporated. Add a second half cup of water and repeat, stirring occasionally, until onions turn golden brown. Stir in vinegar and stock. Raise heat to high and reduce until stock almost completely disappears. Remove from heat, season with salt and pepper and reserve.
While onions are cooking, place potatoes in boiling water to cover and bring to boil until potatoes are tender. Drain well and mash potatoes with a potato masher while beating in enough cream to make a smooth mashed potato, and the butter. Season well with salt and pepper. Preheat oven to 350.In a large gratin dish layer a half of potatoes and the onions. Layer on the rest of the potatoes and sprinkle with cheese. Bake 20 to 25 minutes or until top is browned and potatoes are hot.
Thursday, April 16, 2009
cough.... take 3
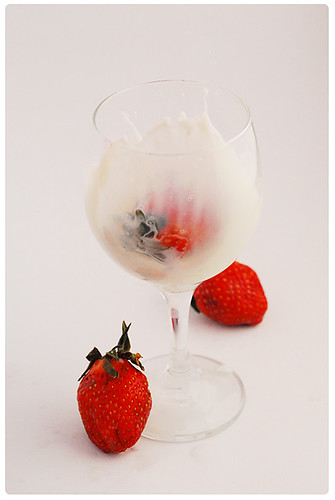
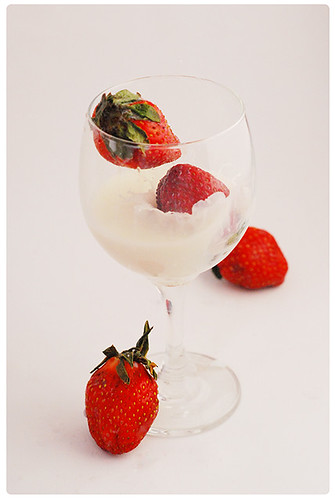
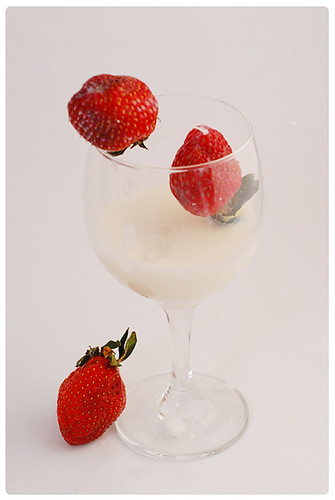
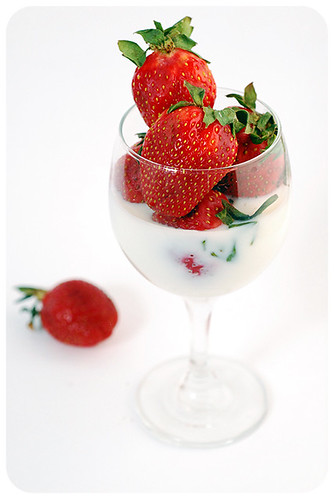
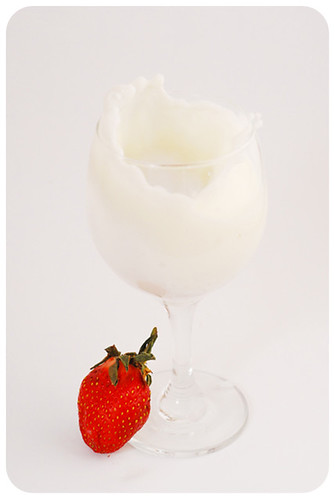
Ok, so why not. I had the chance tonight, and Christie is still really busy with studying exams, so I played around with some of the other Photos I took during yesterdays Strawberry & Milk attempt, and I wanted to post these as well. If anyone likes these, you should head on over to Junglefrog's website and take a look at what she did with this project, great photos :D
Picture day (Part 2)
Hello everyone, back for the results :D
So, if there is something that should have been obvious to me from the start, its that I AM ALLERGIC to strawberries (I swear I view strawberries as a really cute little child straight out of fairy tale that actually secretly eats Kittens or something similarly evil), and handling them constantly while trying to take photos is a real pain. I had to wash my hands every 2 minutes, and keep an eye on anything that came in contact with them and clean it up. The biggest pain was when I had the brilliant idea to try to drop a strawberry ito the glass of milk to catch a nice splash effect. Yeah, seems like a great idea, unless you cant really touch the fruit, then it may be a bad one.
Ive got to say, this was really challenging, you expose properly for the white backround and the Strawberries look like, well, terrible (which pleased me, showing their true evil nature like that). Expose the strawberries properly, and the white goes all funny... sigh. It took quite a few test shots to get it "right", but I think that I found a pretty good balance, and got a few shots that I like before it was too late and I broke out in hives. I ended up having to switch around the lighting that I had planned, and used Junglefrog's suggestion to light the backround at the same time (I held a piece of cardboard up to block the extra light, and set the flash to its widest setting). You can really see the difference that lighting the backround made when you compare the picture above with the one below, big thanks to Junglefrog for the helpful pointer(s)! Next time I try something like this, it will be with a non evil fruit or berry. I could almost hear the strawberries mocking me.
Wednesday, April 15, 2009
Picture day :D (part 1)
Hi everyone! Christie and I have not disappeared, no worries, we’ve just both been absolutely swamped. Christie is in the middle of exams, and I have been working long hours trying to organize the logistics of a large project at work, fun fun.
For this weeks Picture Tuesday, I wanted to do a little something different. The result is a photo, but the challenge for me was to add a new step to my photo taking process. When I photograph food, I tend to just set something up quickly as far as my lighting is concerned, and then begin to make my adjustments as I go, with no real idea of composition or lighting/setup before I start. This kind of leads to hit and miss scenarios, where the lighting is good in one photo, but the composition is off, or vice versa, not to mention the random little things that come up like “honey…. The plate fits into my frame but that jar that you really want in there doesn’t”. It’s a real pain to carefully style a plate, and then realize that the lighting you just set up is actually cut off by that glass, or napkin, not to mention how things like forks and knives reflect light in ways which can throw a photo right off and create unwanted hot spots.
I needed a plan, not a set of instructions that I would make, but a starting point that I could make adjustments to, and provide me with an overall starting point. For this purpose I decided to use MS Paint, yes, I didn’t make a typing mistake there, I am actually using that bit of software listed under Windows “Accessories” that seems to just sit there. I could have used a bit of paper and a pen/pencil, but this way I can keep a digital record of my “set-ups” in case I would like to refer to one in the future.
This past weekend, my brother and his girlfriend paid me a whirlwind visit from Ottawa, and one of the things that I found in my fridge afterwards was a container of fresh strawberries. Now, to most this would be pretty exciting no? Not for me, I am actually allergic to strawberries, and trust me, I have heard all the lines, and received all of the sympathetic pats on the shoulder I can handle about this allergy. Worst of all, it is the only allergy I have, hooray for me.
I did not want to simply throw the fresh strawberries out, as that’s just wasteful, but its not like I am going to eat them, and Christie cant either as we are both just so busy she is not going to put her studying on hold to come and get some strawberries. Photo time!
Last night I entered my apartment after a really long day of work, and had the whole setup planned out to take a Red on White picture, using the fresh strawberries on a white background. The thought was there, but I ended up falling asleep on the couch shortly after getting in and missed out on taking this dangerous picture. So to make up for it, I am putting up the little plan I have for this photo, and when I get in tonight I will take the picture, post it and include any changes I made to the scheme :D Till tonight everyone!
**Updated** Just a quick note, I got the idea to take a Red on white image from Junglefrog's photostream on Flickr. I found a White on White image of a glass Jug full of Milk and thought about how challenging that picture must have been to take. Take a look at her photostream, its really inspiring :D
Sunday, April 12, 2009
Happy Easter - Sugar Shack Time!
There is this great tradition in Quebec, if you haven’t heard of it, it’s called Sugaring Off. Since 90% of Quebec is rural, the province is probably your number 1 producer of pure maple syrup. The time to collect maple sap from the sugar bush (forest of maple trees) is when the sap in the trees thaw, which is around March and April here in Canada. So every Quebecer at one time or another during the two months makes their way to their favourite Cabane a Sucre, or Sugar Shack. Each place serves their own maple syrup from their harvest along with a crazy amount of traditional Québécois food.
This Easter there was no beautiful ham or roast beef, no gravy, no Yorkshire pudding (of which my mom makes the best!) and no wonderfully mashed potatoes. This year my parents and my brother packed up the house and drove up to Montreal for the long weekend. Once here we have all proceeded to stuff our faces with everything from Shish Taouk from Boustan's, steamies from La Belle Provence, breakfast at St. Viateur Bagels(one of the best Montréal bagel places in the world) another mound of French toast, eggs Florentine, bacon, ham and sausage breakfast at Cafe Orange, dinner at a tiny dinner that only 13 people can fit in and is known as one of the greatest poutine places in Montréal (guess what we had?), and finally a wonderful dinner at Taverne, where dessert was none other than a maple chocolate bread pudding and mascarpone maple walnut cheesecake.
As if that wasn’t enough we ran into a store that sells only Brome Lake duck… in all of its many forms. My brother went crazy with joy and had a duck poutine made with duck gravy, duck confit, fries and squeaky cheese curds. You can tell that the cheese curds are fresh because when you eat them they sound like two balloons making love.
Now you would think that we would never want to see Québécois cuisine for at least a little while, but you would be wrong. This Easter we picked up Ian and piled into the car for a 45 minute drive into the Laurentians. We ended up at the ‘Cabane a Sucre Constantine’ which was a massive place, much bigger than most family run places, but we didn't have reservations and we were only there for one thing... the brunch. The event (yes this was definitely an event) started off with creton, fresh breads, coleslaw and four different preserves, pickles, pickled beets, pickled onions, and a very traditional melange of tomatoes and vegetables that they call Ketchup, but is definitely not of the Heinz family. Then came the pea soup, known to keep French Canadian lumberjacks warm. Next they brought out this HUGE fluffy omelette made of at least 10-15 eggs that our family shared topped with maple ham and craquelins. On the side we had maple sausage, maple baked beans, and some simple potatoes. Then you were supposed to drizzle maple syrup all over everything, so I did, I didn’t want to disappoint. Finally for dessert we had a Tarte au Syrup d'érable (maple syrup tart), crêpes with maple syrup and pouding au chômeur which I still am not sure as to its contents, basically I just think it's like a sponge cake baked with maple syrup then covered in more syrup. Needless to say we were stuffed.
After the brunch Ian and I took a stroll down to the tire d'érable hut, a place where they boil down maple syrup until it is very thick, then they drizzle it on snow and when it’s cold you roll it up with a stick and eat it. Brilliant eh!
It’s huge here, so I just wanted to show another picture of when Ian and I had it in Quebec City.
So that was my weekend, I hope you all had a great Easter and I can’t wait to hear about everyone’s holidays. Oh, and I'm sorry about this month, exams are starting and even if I do bake or cook, it's in between studying so Ian hasn't been around to take pictures. Booerns. But come April 29th at 10pm I will be freeeeeee and Coco Bean will resume its normal posting.
Friday, April 10, 2009
Asian Chicken Salad - Barefoot Bloggers
Sorry BB's, this is posted late. But I made it five days early.... does that count?
This was one of the best tasting chicken salads that I have ever had. Maybe it was the peanut butter in it. How can you go wrong with peanut butter? Oh yeah, that's right, you can't! What did you think?
Asian Chicken Salad
adapted from Barefoot Contessa
serves 5
1kg grocery store roast chicken
olive oil
salt and black pepper
1/2 pound asparagus, ends removed
1 zucchini, cut in coins
1 orange bell pepper, cored and seeded
2 scallions (white and green parts), sliced diagonally
1 tablespoon sesame seeds, toasted
For the dressing:
1/4 cup vegetable oil
1/4 cup good apple cider vinegar
3 tbsp soy sauce
1 tbsp dark sesame oil
1 tbsp honey
1 clove garlic, minced
1 tsp peeled, grated fresh ginger
1/4 cup smooth peanut butter
2 tsp salt
1/2 tsp freshly ground black pepper
Remove the meat from the chicken, discard the skin, and shred the chicken in large bite-sized pieces. Cook the asparagus and zucchini in a fry pan for 10 minutes until crisp-tender. Cut the peppers in thin strips. Combine the cut chicken, asparagus, zucchini and peppers in a large bowl.
Whisk together all of the ingredients for the dressing and pour over the chicken and vegetables. Add the scallions and sesame seeds and season to taste. Serve over rice noodles.
Tuesday, April 7, 2009
Picture Tuesday
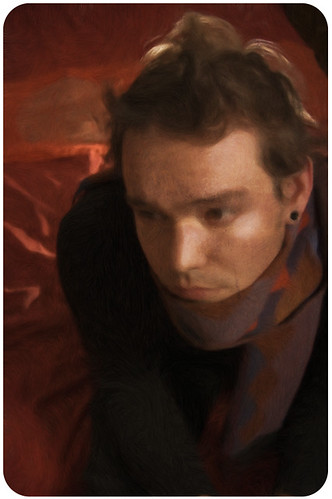
Hi ho, its photo Tuesday everyone, yayyyyyy (flailing my arms wildly above my head like Kermit the Frog)! For this weeks Photo Tuesday, I decided to play around with a Self Portrait that I had taken a few weeks ago that needed a lot of work, with the intended outcome of having a painterly feel to the final image. See, I spent roughly 10 years in post secondary schooling studying and practicing Painting and Drawing, then suddenly found myself out in the real world where painting 4x4 foot portraits was just not a feasible way to pay my rent and bills. Now that I have spent a few years in an actual “career”, I have found myself slowly but surely floating back to my artistic passions, and photography has become the focus of that passion over the past year or so, with a real centered focus and commitment being made by me to get better at this medium over the past 3-4 months.
When I first joined Flickr, I was spending hours at a time just searching through Photostreams of these incredibly delicate, painterly images made through various processes. Sure, you can pick up a Photoshop magazine and learn how to quick paint with cloning brushes, but what fun is it if you let the computer do all the thinking for you? The chances of getting something that may give you that unexpected look is there, but if you want consistent results you really need to study, and more importantly play, with these new software’s, and work on your lighting as that really is the key to good photography, lighting. Getting back to the Flickr images, I started out trying to achieve painterly effects by layering textures over images I had already, and some of them worked alright, but nothing more than fairly cool looking graphic work, the images, for the most part, missed that warmth that I love to bring into my painting work. I kind of gave up on making quality images of this sort soon after, crediting a fair part of the work I was praising so much to far superior photoshoping skills then I possessed.
Fast forward a few months, and here I find myself having to use functions in Photoshop I didn’t even know existed in order to work on the Cocobean blog photography (note that my Photoshop skills were limited to rotating and applying filters from the preset menus previously). I have to point out here that it has helped me tremendously to have Christie there supporting my learning of various software’s as well as lighting, she even looks up images and articles that she thinks I would find interesting or inspiring and shows them to me. For Xmas this past year, Christie got me a Wacom Graphics tablet, which I now refer to as “my preciousssssssss”, as have a hard time imaging myself without one now.
Back on topic. Adding all these factors up, I decided this past Monday night to play around with a bit of everything, lighting, Photoshop and my Wacom tablet, and I am actually pretty happy with the results, I finally got that painterly feel that I aspire to get so much (I think). It was really fun seeing how comfortable I have become working in the software, and to see how much I have learned. it’s a good measure for me, having started out a few months ago frustratingly trying out different textures and modes of blending trying to hit the jackpot, to being able to use the tools and make what I want the image to be is great. Hope you guys like it as much as I enjoyed making it.
Technical stuff:
I started out with an underexposed image, about 2 stops too short, so it was going to be a good challenge. Luckily I had shot the image in RAW format, so it provided a lot of flexibility as far as exposure. For the Self Portrait itself I used the following setup
-Camera (Nikon D40 for this) on fully extended Tripod with 28-80mm set to approx 35mm F8, set to be triggered by remote (I had a small working space so wide was good for what I wanted to do)
-Vivitar 285HV flash on light stand, shot through a white umbrella at 1/16th power to my left, above my head and pointing at my face (about 3-4 feet away)
-Cheapo Vivitar flash with 4 Kleenexes held over the head of the flash with an elastic band to diffuse the light set behind me, pointing at my upper back
-Cheapo Ebay Cactus radio remote triggers
-Camera set to -1 ev to saturate the background :P
Photoshop work
Upped the exposure to +1.7 (anything more was going to blow out the darks)
Curves layer for further adjustment
Smart blur layer to smooth out the details
Some Shadow-Highlight tinkering
Crop
Rounded edges
Painter X
Traced the Jpeg using Wacom Tablet
Painted the image using an Acrylic dry brush
:D
Sunday, April 5, 2009
Baby Back Ribs for Ian's Birthday
OK, so I lied. The pictures are actually being posted today, two days after we ate those beautiful baby back ribs. And the reason, well you see I am a secret spy and I was called away on a mission. Ian is also a spy but he works for a rival company and our code names are Mr. and Mrs. Smith. I have big lips and Ian looks very similar to Brad Pitt. This business that needed to be attended to, code name "sit on the couch and be lazy all weekend" was a very tough and complicated one. I can not tell you anymore, other than I was fighting off the evils that threaten our dear country, not anywhere near the living room or DVD player.
Ok, Ok, you got me...there is no need for spies in this country because no one would threaten Canada, what could they possibly want, our Maple Syrup? If they asked nicely we would give it to them.
The truth is that Ian and I had a nice quiet day inside eating delicious leftovers after he partied his birthday night away.
As you can probably guess the night of Ian's birthday was quite a blur for him. Luckily we had a nice dinner for two before the antics started. I knew that ribs were going to be on the menu because we watched this new show on Food Network Canada called "Chuck's Day Off" and Ian was practically licking the screen when Chuck made his signature ribs. Now this guy Chuck has a four star restaurant down in the Old Port of Montreal but the episode aired last Monday night and I knew that I would never be able to get reservations for Friday.
So, I called my mom and begged her for her rib recipe. My mom makes THE BEST RIBS EVER. Everyone knows it, and no one would ever dispute it. But it just started to get warm here and the BBQ's won’t be running for at least another couple weeks, so she sent me a revised version that uses the broiler. I didn’t want to make Chuck's because it was long and involved where as my moms recipe was super simple and I knew it would come out great. I also bought some amazing racks from our wonderful butcher down the street and the result was some fall off the bone, pure heaven ribs. If Ian had his way we would be eating these every day of the week.
My Mom's Amazing Ribs
2 racks Pork back ribs (makes enough for 4)
2 cups hot water
Kraft BBQ sauce
(some BBQ sauces are very strong and will overpower the ribs but this one has a subtle flavour. Use your favourite if you like.)
Pre-heat oven to 325°F
Remove thin, translucent membrane from the non-meaty (concave) side of ribs. This will allow flavours to penetrate more effectively, and give a more tender end product. The best way to do this is to loosen a little of the membrane at one corner using your fingernail. Then, with a paper towel, grasp the membrane firmly and pull it away from the ribs.
Place ribs covered lightly in BBQ sauce, meaty side up, in a 2-inch (5 cm) deep baking sheet or dish with water and cover with foil. Bake in oven for about 1 1/2 hours, or until meat begins to shrink away from the bone tip, and meat is easily pierced with a knife point. Remove from oven and at this stage, ribs can be refrigerated for up to 3 days.
Slather ribs with BBQ sauce and place on baking sheet lined with foil. Move oven rack up close to the top elements. Turn oven to Broil.
Baste and turn every few minutes or so until ribs are nicely coated and hot. Barbecue sauce burns very easily, so keep a close eye on them.
OR
Slather ribs with BBQ sauce and place on baking sheet lined with foil in the oven at 325°F (in one layer - no water) and check every 15 minutes until they are coated and sticky.
Friday, April 3, 2009
HAPPY BIRTHDAY IAN
Well if you can't tell from the title.... it is Ian's Birthday today. I made him two beautiful racks of Baby Back Ribs and my famous caramelized onion mashed potato gratin. For dessert I created these two cute little key lime cheesecakes with candied lime slices on top(I also took a chunk out of my thumb with the mandolin while slicing them, hence the "thumb head injury" in the pic!). Pictures will be posted tomorrow... if there is anything left!
Wednesday, April 1, 2009
Picture... uhhh... Tuesday?
Yayyyy is picture Tuesday…. Umm… I mean Wednesday? Alright, so I was really tired yesterday and didn’t post, so my picture day has been pushed back to Wednesday this week, but I am still calling it picture Tuesday because this here is the interwebz and I can do what I want, well, almost. One thing you are going to notice right away is the lack of a picture in the context of this posting, and that’s kind of the point for me today. I’m getting ahead of myself, let me explain.
Flashback to this past Sunday, relaxed, nothing out the usual, Christie and I decided to venture to the downtown center of Montreal to do a little bit of shopping and to return a book at Chapters. Turns out the weather wasn’t so great, it was cold damp and rainy, not a fun day to be strolling around. Now Chapters isn’t exactly my favourite place to find books, I am one of those guys that prefers the second hand, musty disorganized type over the latte serving sort (not that there is anything wrong with that, I’m just a sucker for that old book smell). I seem to be like that with most things, and very much so with photography. I prefer my old, clunky heavy metal film cameras over digital, heck, I have a Mamiya M645 medium format camera that is in amazing shape, and this includes my flashes, old, battery heavy, and in need of large cables and plungers to get it all going off camera. This is why this recent upgrade to a Nikon D80 has been such a breakthrough for me, for the first time, I am embracing the technology, and that means learning all the things I can do with it. When I was avidly running around with my clunky Pentax KX, off camera flash meant studio lighting and equipment that was far financially out of my reach, but suddenly, for a nominal fee, I can have a high end flash, and it can be used off camera wirelessly, without any accessories… OMG. Seriously, to most of the photographic world this is now the normal, expected with almost all “Pro” Nikon digital SLR camera bodies, and this is just amazing to me. 10 years ago I would have needed long cables and diagrams and… ughhh… tons of expensive equipment, now you just need a good Nikon and a Speedlight or two or three. Amazing.
So, going back to Chapters here, I decide to take a little peak at the books in the Photography section while Christie is shopping about, and I stumble upon something totally unexpected. As you may have read previously, or assumed by now, I have become quite a fan of David Hobby’s blog, Strobist. On this site a few days or so ago, I read an article about a book that was reviewed and highly recommended, “The Hot Shoe Diaries” by Joe McNally. I was pretty surprised to find it, and had to pick it up to take a peak. Two flips later and I had to have it, I swear I put it under my arm and rushed down two flights of stairs to find Christie and show her my prize. I lied to myself for a minute that maybe I wouldn’t get it since it was 47.99 Canadian, but something told me I found it for a reason, so of course I got it.
Now back full circle to why I am not putting a picture here that has been specifically made with today’s post in mind. I know diddly squat, nothing, nada, about lighting. Really, I thought I was learning pretty quickly and getting on well enough, and honestly, I was seeing the proverbial tip of the iceberg. Did I mention that this book showed me that I know nothing? Yeah, I did, but wait, hold on here, it’s a good thing. I’m on the right path, and already I’ve learned that I am using wild light, not directing it or shaping, or even coloring the light. Damn. Be warned, if you are a Canon camera user, this book deals specifically with Nikon camera equipment as far as the setup is concerned, but it is a valuable tool nonetheless. My plan? I have a lot to learn, and I am in the middle of drawing up plans to make some of my own equipment to help me, such as diffusers and softboxe(s), snoots, grids etc. That’s a lot of jargon, but go ahead and do a quick search on Flickr for any of those terms and put “DIY” before it (ie DIY softbox), and you will get tons of results showing you completed plans and sample pictures of the results, you will be amazed at what a few pieces of plastic and cardboard with tape can do for your photos if you have a flash. You can also get a pretty nice bit of the book for free in PDF format by going to this site and clicking on “sample”, and there is always the completlely free lighting course on the Strobist blog, just click on Lighting 101. Go ahead, check Flickr, get the sample, read the lighting 101 course, you wont regret it, and I will keep everyone here posted with my results and my builds as I go.
Resources:
Strobist: http://www.strobist.blogspot.com/
The Hot Shoe Diaries (click sample): http://www.peachpit.com/store/product.aspx?isbn=0321580141
Some amazing DIY equipment made by a very talented Flickr user: http://www.flickr.com/photos/nickwheeleroz/sets/72157604254959243/
Subscribe to:
Posts (Atom)