
While browsing around Cream Puffs in Venice’s blog I came across this great Challenge. Basically you rummage through all those old foodie magazines that you have lying around or squirreled away from who knows when, and you finally make one of the recipes. This way you are trying something new AND getting some use out of that bookshelf full of dusty "meant to make it" recipes. (Seriously, it’s a bookshelf.)
If you know me then you know I am a crazy food magazine addict. I check the newsstand daily for my favourites, even if I know they won't be coming out for another month. I even buy them in French because it forces me to practice the language. Needless to say, the semester that we were studying grammar and names of food products I got an A+.
Even though I love reading these magazines, there are just too many and I completely forget to make any of the recipes. That is why this challenge was right up my alley. And even though I didn't use one of the French recipes I still re-read three of the magazines today searching for the perfect premier recipe. Yes, my French teacher would be proud.
This recipe came from Fine Cooking Magazine, a pretty expensive magazine (10 bucks in Canada) that is really worth the money. I only came across it a couple months ago when Ian was sick and I needed something to read and pass the time. Wow though, it's like a new little cook book every month. When I heard caramelized onions, goat cheese, dill, artichokes, and smoked salmon I knew there was no way I could go wrong.
We really didn't feel like making the crust for the quiche...so we bought it Gaaaaaspp! Whatever, it was so worth it. Two gourmet quiches with minimal effort, umm yes please.
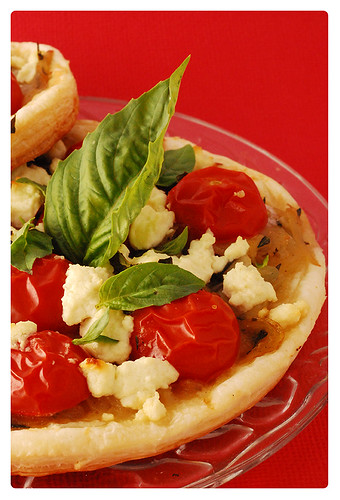
Smoked Salmon, Dill, Goat Cheese, and Artichoke Quiche
adapted from Fine Cooking Magazine, April/May 2009 #98
makes 2 quiches
2 deep dish frozen pie crusts
1 tbsp. unsalted butter
1/2 medium onion, thinly sliced
1 386ml can of artichokes, drained and cut in quarters
4 large eggs
1 cup 10% cream
1/2 cup milk
3 Tbsp. roughly chopped fresh dill
salt and freshly ground pepper
Pinch nutmeg
6 oz. smoked salmon, roughly chopped
4 oz. fresh goat cheese
Preheat the oven to 400F. Prebake the two pie shells for 8 minutes on a baking sheet.
Melt the butter in a sauté pan over medium-high heat. Add the onion and cook until soft and turning translucent. Add the artichoke hearts and cook until softened and slightly browned, another 4 minutes. Remove the pan from the heat. Beat the eggs in a bowl with the cream, milk, dill, salt, pepper, and the nutmeg. Pour 1/44th of the egg mixture into each crust. Bake in the oven until the filling is partially set, about 15 minutes. Scatter half of the onion and artichoke mixture, the salmon and the goat cheese over the partially set egg mixture. Pour on the remaining egg mixture and then scatter the remaining onions, artichokes, salmon, and goat cheese over the egg. Bake until the center is set, another 20 minutes. If the crust is browning too fast, cover it with strips of foil. Cool for 5 minutes before cutting. Garnish with extra dill.


.jpg)